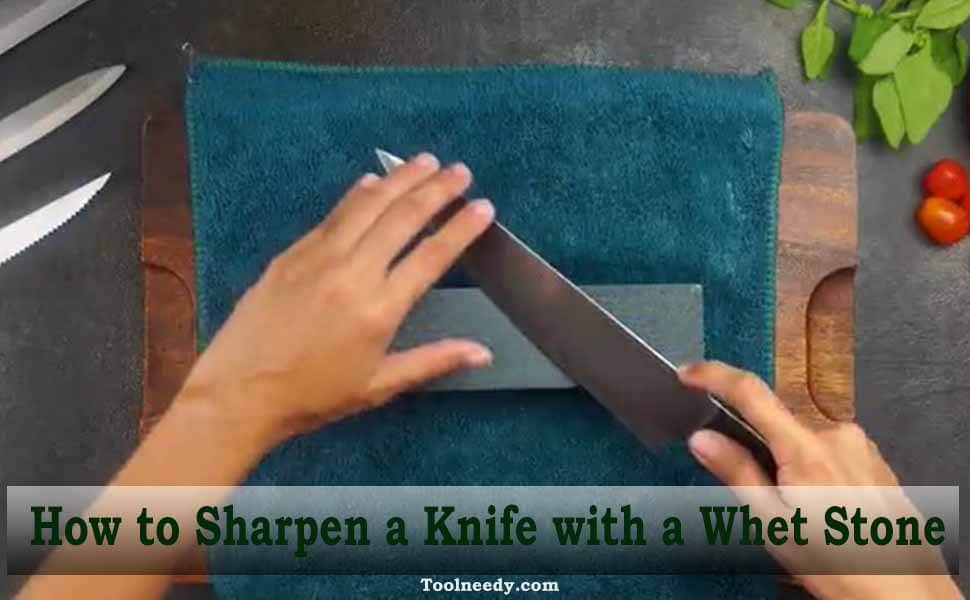
If your knife is not getting the job done properly and smoothly, you must look for a new knife or can sharpen it. To be honest, there is nothing more frustrating than a dull knife if you cannot do the work with it perfectly. A quality knife can be expensive but if you can make your existing knife sharpened as a new one, why should you buy a new knife? Dull knives can be dangerous easily slipping off of an onion or a potato into your fingers. So, before happening an accident like that we are going to learn how to sharpen a knife with a whet stone. You can sharpen your knife by using a honing rod, or even by a coffee mug.
Most home cooks sharpen their knives at least twice or thrice in a year but those who use the knives frequently should sharpen the knives more often. However, if you want to make your knife sharpened, there are three ways open to you.
Option 1: An Electric Sharpener
The first option for you to make your kitchen knife sharpened is to use an electric sharpener. What do you think- is it really good? However, I don’t comply with you anyhow. First off, by using an electric sharpener, the knife may lose a big amount of materials from its edge that makes it off balance. In addition, if you are not a good sharpener, the knife can end up with big damage.
But a better choice is waiting…
Option 2: Hiring a Professional
Sending your knife out to a professional is certainly a good option. Fortunately, if you have a professional knife sharpener living around you, it is worth a shot. Besides, are you willing to pay him to have the services performed? Well, if you use a knife sharpener four or five times a year, you will have to pay which can be expensive. Apart from this, you may know, a knife sharpener professionals also use a grinding stone that takes much more materials away from the knife which is almost no different from an electric sharpener. It also potentially reduces its lifespan.
Anyways, what if there is a way that is neither expensive nor takes away materials from your knife? Then, the option you are looking for is…
Option 3: A sharpening Stone
Using a sharpening stone is the best option to be truthful. This method to sharpen your knife blade lasts longer than the above two methods. By using a sharpening stone, the knife doesn’t get blunted so easily and quickly. Believe it or not, after proper sharpening your knife with fine enough grit, your knife would be able to cut hairs off your arm. However, the act of sharpening your knife will make a much stronger bond with the blade. This is why knowing how to sharpen a knife with a whet stone is essential. Don’t worry, we will go through the steps.
Contents
- How to Sharpen a Knife with a Whet Stone
- Step 1: Soak your Stones
- Step 2: Make Your Equipment Ready
- Step 3: Make the First Stroke
- Step 4: Maintain the Proper Angle
- Step 5: Repeat the Strokes
- Step 6: Change Sides and Continue
- Step 7: Sharpen in Reverse
- Step 8: Change the Side Again
- Step 9: Switch Stones to Sharpen Final Side
- Step 10: Fix the Stones
- Step 11: Clean up
- Step 12: Hone and Test Your Blade
- What Are The Pros and Cons of a Whet Stone?
- Can I Over-Sharpen My Knife Blade?
- How to Store Your Knives to Keep Them Sharp?
- How to Use a Mug to Sharpen Your Knife?
- How to Tell If Your Knife is Sharp Enough
- When to Use a Knife Sharpening Steel
- How to Use a Knife Sharpening Steel
- How to Clean a Sharpening Stone
- Final Words
Choose the Necessary Items
Before we go through the procedure, we need some essential equipment. Stone is the most important of all of them. There are many types of stones with different grit to sharpen your knife. As the topic states, how to sharpen a knife with a whet stone, and here we will discuss and select the whet stone to sharpen the knife.
Stones – you need to choose the style of stones first.
Usually, users choose a natural or synthetic stone. The main feature of this kind of stone is you can use it in water, oil, or dry.
Besides, there is another kind of stone which is diamond stone. Actually, this type of stone is named after diamond stone because there are very small diamonds attached to a metal surface. Though these types of stones are effective to sharpen your knife quickly. unfortunately, these stones wear down faster than others. Diamond stones are the most expensive. They last the longest.
However, Oil stones are the least expensive, and yes, they are made of harder materials. Oil stones are a little messier and you need a long time to clean up the stone and knife.
Grit – Select the grit of the stone
Besides choosing a type of stone, choosing the right grit for sharpening the knife. Sharpening tones are available with different grit sizes and you need to select the perfect one for you. Among fine, medium, and coarse stones, you have to choose one.
You are now thinking how can I choose the right grit, right? Well, you can choose a coarse stone followed by a fine grit in case your knife blade is dull. However, if your knife is not that dull and made it sharpen recently, you can go for the medium grit. You should try a grit level ranging from 325 (for coarse) to 1200 (for extra fine). However, you can choose a stone that has different grit levels on both sides.
Remember, the higher the grit, the sharper the edge you will get, but the more strokes it will take to get you there.
Some Good Quality Whet stones
How to Sharpen a Knife with a Whet Stone
Since we have already selected what type of stone we need and what should the range of the brit be. Now, we can proceed with the procedure to sharpen the blade. So, let’s get started.
Step 1: Soak your Stones
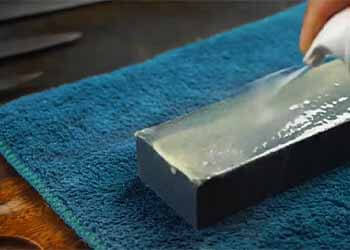
If you are working with Waterstones, it is very essential to submerge the stones in water for more than an hour. Some say submerging the stone the whole night would be effective while others say 2-3 hours is enough to be fully saturated.
However, if you don’t put them underwater enough time, they may dry out during sharpening giving your edge nicks and dings. This is why soak both the stones and your stone fixer.
Step 2: Make Your Equipment Ready
To start sharpening your knife, you have to ready your equipment. Put a towel on a plain wood board or table. Now keep the soaked stone on the towel. The knife beside it. And yes, a bowl of water is also required to manage it and keep it near you. Now your station is ready and you can start now.
Step 3: Make the First Stroke
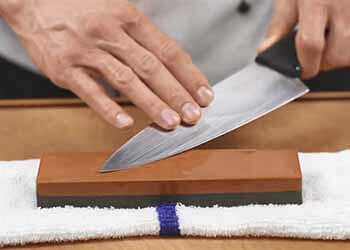
Do you understand where and how to begin the strokes? Well, you should begin with the lower-grit stone. So, to begin the stroke, place the heel of the knife on the far edge of the stone and hold the knife blade firmly at a 17- to 20-degrees angle. Now carefully and slowly, using even pressure, drag the blade over the stone toward you down the length of the stone. And then, move the contact point of the knife blade towards the tip of the blade. This is how you go on sharpening.
Step 4: Maintain the Proper Angle
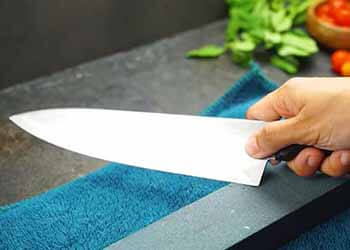
One of the best tricks and techniques to sharpen a knife with a whet stone is to maintain the angle properly. Whimsically stroking the knife on the whet stone won’t bring any effective result. So, what is the appropriate angle I am talking about? Well, here comes the various opinions from the experts. Some professionals say a 17-20 degrees angle is perfect while others think a 20-30 degrees angle would be better for sharpening your knife. So, use your trick and try to maintain the best angle that works for you. Try any angle between them that suits the blade.
Step 5: Repeat the Strokes
You still need to repeat the same strokes. As earlier mentioned, each stroke you make should make a count with the tip of the knife touching the bottom of the stone. Again, lift the knife, reset the heel at the top of the stone, and repeat. You should repeat this action five times at least. However, it varies and can take additional strokes depending on the dullness of the knife you are sharpening.
Step 6: Change Sides and Continue
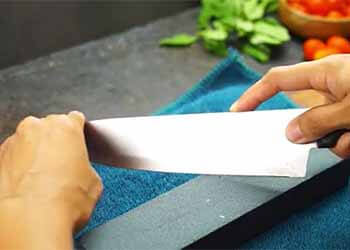
Now you have to change the side of the knife blade and start the strokes again. Here there is no trick to apply. Just flip the knife to the other side and sharpen using the same motion. You should stroke the same number as you did for the other side. It can be 5 or 10 times, whatever the number is- just maintain the equal times of strokes.
Sometimes the strokes can take more than that and then you need to maintain accordingly.
Step 7: Sharpen in Reverse
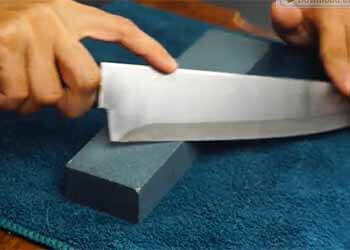
This time you need to sharpen your knife blade in reverse. So, return the knife to the original side (the side you started with first) but the position of the knife should be from the tip to the heel. Now, repeat this motion five times at least. The stroking frequency can vary too depending on the dullness of the blade.
Do not forget to sharpen your blade in reverse. If you do, you may not get the effective result you want. This is why sharpening the knife blade in reverse is important.
Step 8: Change the Side Again
Now, flip the reverse side and start sharpening the knife from the tip to heel at least five times (or the number of times you stroke in step 6).
Step 9: Switch Stones to Sharpen Final Side
The final moment of the sharpening processes is now. Just turn the sharpening stone to your finer grit stone and repeat the steps 1-5 times or whatever times you need to make it mirror-like sharp.
Step 10: Fix the Stones
The whetstone can develop grooves after repeated use. It causes a hindrance to their sharpening power. This is why fixing them is mandatory. To fix the stones, use a low-grit stone fixer. Place the fixer flat against the stone. Push it back and forth gently to grind down the stone. This is how you can create a flat, new surface.
Step 11: Clean up
Now clean the blade up with the towel. They would also be used for wrapping the stone for better storage. You need to dry the stone first perfectly and then you can store the stone carefully.
Step 12: Hone and Test Your Blade
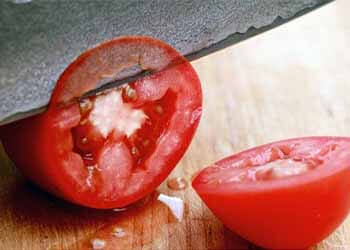
At this stage, hone your blade on honing steel to make sure to get the edge in alignment. Now test the knife for sharpness. Though some people recommend holding it up and slicing through it. But in the point of my view, this is not quite a test for a sharpened blade.
Better you slice a vegetable like a potato or a ripe tomato. If you can slice a ripe tomato thin enough to see through it, yes, you successfully sharpened your knife blade.
Congratulations! You successfully sharpened your knife to the desired level of sharpness you wanted.
Tips: Stroking consistency is the key to sharpening your knife. So, you must maintain the same angle each time and make sure that you sharpen both sides of your knife equally.
What Are The Pros and Cons of a Whet Stone?
A sharpening stone to sharpen a knife blade is one of the most essential types of equipment. Every professional cook keeps a whetstone to sharpen their knives. Making sharpened knives from a professional sharpener may be expensive and time-consuming. So a whet stone can help you out from this problem. However, a whet stone doesn’t have only pros, it has cons too. So, let’s see the pros and cons of a whetstone.
| Pros |
|---|
| · Extremely adaptable. · Can be different types of whetstone such as Western, hybrid gyutou, Japanese. · Can be sharpened knives with a full bolster. · Most whet stones have a coarse and fine side that determines the amount of sharpening at each pass. · Relatively inexpensiveWhetstones last a longer time. |
| Cons |
|---|
| · Without holding the knife at the correct angle, you may not get effective results. · A dull blade takes time to restore its sharpness. |
Can I Over-Sharpen My Knife Blade?
Very common questions from users end. Well, the straight-cut answer is No. But the answer can be yes too. Let’s see the fact.
In terms of an electric sharpener, this is just a myth. A general electric sharpener takes off too much materials that can make the knife imbalanced. But there is some quality electric knife blade sharpener in the market that allows very little materials to take off from the knife. Besides, those electric sharpeners have three options for sharpening: coarse, fine, and non-motorized steel. And you know what the sharpening options are for. The fine slot is great for polishing up a barely dull knife. This will not harm your knife because the lightest sharpening with the fine side of the electric sharpener will not allow any metal loss. And still, if you are worried about your knife, you should learn better how to sharpen a knife with a whet stone or how to sharpen a knife using a stone, or how to sharpen a knife on a sharpening stone.
How to Store Your Knives to Keep Them Sharp?
Following some techniques, you can store your knives to keep them sharp perfectly. You should know about this. However, if you know how to sharpen a knife with a whet stone or how to sharpen a knife using a stone, you can sharpen your knife like a mirror-like sharp. Some people want to know how to sharpen a knife on a sharpening stone too.
The Knife Sharpening Takeaways Are –
- The first tip is to sharpen you knife regularly. Over-dulled or blunted knife would be very difficult to restore its sharpness. To do it manually, learn how to sharpen a knife with a whet stone. If you don’t do this, even the best quality knife will dull over time with regular use.
- A sharp knife can keep you safe from injury. If you want to cut garlic or other vegetable, it can slip off and you may be injured. That’s why keeping you knife sharpened all the time is a wise decision. Again, you can take help by searching how to sharpen a knife on a sharpening stone or how to sharpen a knife using a stone.
- Sharp knives are good to use. Image, you all have go to sea-beach and took some green coconuts. If you wanted to cut it and if the knife is not sharp enough, what would it be? There must be nothing frustrating than that. So, a sharp knife can be your best friend either in a kitchen or any outdoor parties. Once again, if you need to know how to sharpen a knife with a whet stone, you can take help from this article.
How to Use a Mug to Sharpen Your Knife?
What if you have a small knife and yet you don’t have any knife sharpener or you don’t know how to sharpen a knife with a whet stone, what would it be? Well, there is an easy option to make your small knife sharpened instantly. You can use a coffee mug. How?
You can use the unglazed bottom of a ceramic mug to sharpen small knives. Just apply moderate pressure holding the knife at a 15-17 degree angle and then stroke gently the entire length of the blade across the rough surface. Do it a few times and your knife can restore its sharpness again.
How to Tell If Your Knife is Sharp Enough
After sharpening a knife using a stone or steel rod, you can check whether it really got back its sharpness or not. Well, you can do this test easily.
Method 1: Hold the sharpened knife in one hand and a newspaper on the other. Try to slice the paper through and see what happens. If the knife is able to slice the paper smoothly, you can know that your knife is sharpened enough.
Method 2: Take a ripe tomato and try to slice it. If the blade is able to cut it thin enough that you can almost see through it, you have to understand that your knife blade is sharp enough.
However, if the knife doesn’t pass the test, you have to re-sharpen it. If you don’t know how to sharpen a knife, read this article and know how to sharpen a knife with a whetstone, or how to sharpen a knife on a sharpening stone.
When to Use a Knife Sharpening Steel
Can sharpening steel really sharpen a knife? Well, it can’t. Rather it hones the edges of a slightly dull blade. Sweeping the blade along the sharpening steel actually re-aligns the edge. This process can restore the sharpness better than before. It is truly essential to get an effective result to maintain a 17-degree angle.
How to Use a Knife Sharpening Steel
If you have already learned how to sharpen a knife with a whet stone or how to sharpen a knife on a sharpening stone, you can then learn easily how to use a knife sharpening steel. A knife sharpening steel is not that hard. Just follow some steps and you will be able to successfully sharpen your knife.
Step 1: What you need to do first is hold the steel rod vertically with the tip firmly. Place the heel of the blade against the tip of the steel. Now point the knife slightly upward. Try to maintain the blade a 17-degree angle away from the steel.
Step 2: now, slide the blade down the length of the rod in a sweeping motion. And now pull the knife toward your body. Why towards the body? It should be towards to body so that the middle of the blade is in contact with the middle of the steel.
Step 3: don’t forget to pass the tip of the blade over the bottom of the steel. However, repeat this motion on the other side of the blade too. If the blade is not so dull, 1-5 strokes should realign the edge.
How to Clean a Sharpening Stone
Cleaning and storing a sharpening stone is important. After every use, simply use a damp towel to wipe away any metal shavings and excess oil. However, it is unnecessary to rinse or wash the sharpening whetstone after every use. Let the stone dry properly after wiping it down. And then, store it in a box or store it in a dry place to keep it perfect.
Final Words
We hope you have already learned how to sharpen a knife with a whet stone. This topic is similar to how to sharpen a knife using a stone or how to sharpen a knife on a sharpening stone. However, if you want to sharpen your knife properly, follow the steps of how to sharpen a knife with a whetstone.
If you have got all your questions answered, that is great. If you have anything to ask about how to sharpen a knife on a sharpening stone, you can reach out to us. We will try to answer the questions on how to sharpen a knife using a stone.
You May Like –
- How to Sharpen a Utility Knife Blade
- Different Types of Utility Knife Blades
- How to Sharpen a Carpet Knife
- How to Change Retractable Blade

